
Two powerful streaming devices for your professional streaming needs!
Honey’s Anime was granted the opportunity to check out the Live Gamer Ultra 4K and the Live Gamer Extreme 2 for this unboxing/review. We went in knowing about AVerMedia and their success but have never really tried it before. We’ve used XSplit, Streamlabs OBS/OBS, and Elgato, but what we discover regarding AVerMedia’s devices, was definitely surprising and more than we initially thought.
In this article, we’ll be diving into the streaming devices and pointing out all there is regarding the two. So, kick back and enjoy the read as we go into to detail what AVerMedia has in store for us gamers and content creators alike!
About AVerMedia and the Live Gamer Ultra 4k + Live Gamer Extreme 2
AVerMedia is one of the leading multi-media companies in the world, producing technology and experiences for consumers in the field of video, audio, and performance-enhancing programs and accessories, and devices for professionals and enthusiasts alike.
Today, we’ll be taking a look at AVerMedia’s recently released streaming devices, the Live Gamer Ultra 4k and the Live Gamer Extreme 2, for beginner and pro gamers wanting to stream on YouTube, Twitch, Vimeo, etc. The two devices are a bit different from each in performance and other obvious points. We’ll also be talking about the streaming program it comes with called RECentral 4 and the RECentral Express.
For starters, the Live Gamer Extreme 2 is a new device that excels in live streaming and pre-recorded video from your desktop/laptop compared to its predecessors. With better resolution, high-performance processors, and a sleek new look with some added features, the Live Gamer Extreme 2 is the newest video capture device along with the Live Gamer Ultra 4K, which is basically the same but with slight differences like pushing 4K resolution. First, let’s start by talking about the Live Gamer Extreme 2!
Live Gamer Extreme 2
Specs:
- Interface: USB 3.1 (Gen1) Type C
- Video Input: HDMI 2.0
- Video Output (Pass-Through): HDMI 2.0
- Audio Input: HDMI 2.0
- Audio Output (Pass-Through): HDMI 2.0
- Max Pass-Through Resolutions: 4Kp60 / 1080p60
- Max Record Resolutions: 1080p60
- Supported Resolutions (Video input): 2160p, 1080p, 1080i, 720p, 576p, 480p, 480i
- Record Format: MPEG 4 (H.264+AAC)
- Dimension (W x D x H): 145.3 x 97.2 x 29 mm (5.72 x 3.83 x 1.14 in)?
- Weight: 182 g (6.42 oz)
Notes:
- LGX2 does not support viewing/recording/streaming of HDCP protected signals
- Pass-through above 1080p60 only supports 4Kp60 (2160p60). Does not support HDR, 1440p, ultra-wide or high frame rate.
Operating system: Windows® 10 x64 (System Requirements for dedicated streaming PC):
For 1080p60:
Desktop:
- Intel® Core™ i5-4440 3.10 GHz or above
- NVIDIA® GTX 660
- 4 GB RAM (8 GB recommended)
Laptop:
- Intel® Core™ i7-4810MQ
- NVIDIA® GeForce® GTX 870M
- 4 GB RAM (8 GB recommended)
Notes:
- LGX2 does not support USB 2.0
- We strongly recommended using Intel chipset.
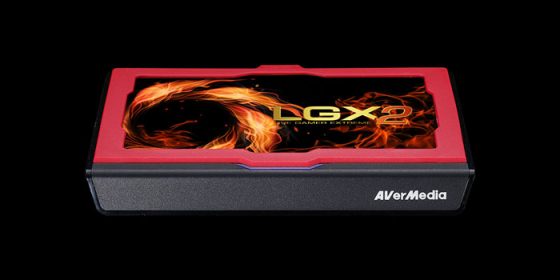
The Live Gamer Extreme 2 comes in a nice and simple box that upon opening it, you will immediately see the device. One thing to note is that this device has a custom image slot for you to add any image you’d like to make it your own and give it that extra finesse of knowing this is a part of you and your efforts in streaming live. The Live Gamer Extreme 2 comes with 1 HDMI cable and 1 USB 3.0 cable. It also comes with a free code to redeem the CyberLink PowerDirect 15 editing program which provides additional editing tools and features to make your recorded video look more professional than you could ever imagine which we’ll talk more about a little later.
The Live Gamer Extreme 2 is quite easy to set up. All you need to do is hook up your device using the USB 3.0 connector, run the HDMI cables to your gaming device—whether it be a console, PC, or Nintendo Switch—, download and run the streaming program and enjoy. The Live Gamer Extreme 2 provides a crisp clear image of your game in the program which has very little to no lag, so if you wanted to, you could focus on the live video in the program rather than using your TV/monitor for gameplay.
While the device is running, it has a light indicator showing when you are live or recording and is very quiet with no disruptions. The connectors for the cables to the device and vice versa are in the back of the device so to provide a more comfortable placement on your desk or wherever you may have it. This allows for the cables to be hidden and not in the way.
The last thing we want to talk about with the Live Gamer Extreme 2 is the display slot for customization of any image you’d like so long as it meets the required dimensions. It’s as easy as printing out your image, a quick unscrew of the pin for the display frame, place your image and reattach the screw and you’re done!
Live Gamer Extreme 2:
Live Gamer Ultra 4K
Specs:
- Interface: USB 3.1 (Gen 1) Type C
- Video Input: HDMI 2.0
- Video Output (Pass-Through): HDMI 2.0
- Audio Input: HDMI 2.0
- Audio Output (Pass-Through): HDMI 2.0
- Max Pass-Through Resolutions: 2160p60 HDR /1440p144 / 1080p240
- Max Record Resolutions: 2160p30 / 1440p60 / 1080p120 / 1080p60 HDR
- Supported Resolutions (Video input): 2160p, 1440p, 1080p, 1080i, 720p, 576p, 480p
- Record Format: MPEG 4 (H.264+AAC) or (H.265+AAC)*
- Dimension (W x D x H): 112.6 x 66.2 x 26 mm (4.43 x 2.6 x 1.02 in)
- Weight: 116 g (4.09 oz.)
Notes:
- H.265 Compression and HDR are supported by RECentral
- LGU does not support viewing/recording/streaming of HDCP protected signals
Operating system: Windows® 10 x64 (System Requirements for dedicated streaming PC):
For 4Kp30 or 1080p120 (4Kp60 HDR pass-through supported)
Desktop:
- Intel® Core™ i5-6XXX or above
- NVIDIA® GeForce® GTX 1060 or above
- 8 GB RAM (*Dual-channel)
Laptop:
- Intel Core i7-7700HQ or above
- NVIDIA® GeForce® GTX1050 Ti or above
- 8 GB RAM (*Dual-channel) *You have to set your memory on dual channel mode in your computer system. Please see
For 1080p60 (4Kp60 HDR pass-through supported)
Desktop:
- Intel® Core™ i5-4440 3.10 GHz or above
- NVIDIA® GTX 660
- 4 GB RAM (8 GB recommended)
Laptop:
- Intel Core i7-4810MQ
- NVIDIA® GeForce® GTX 870M or above
- 4 GB RAM (8GB Recommended)
Mac system requirement :
- Operating system: MacOS High Sierra 10.13
- Mac Thunderbolt 3 (USB‑C) Cable (0.8 m)
For 4Kp30 or 1080p120 (4Kp60 HDR pass-through supported)
iMac:
- 3.6GHz quad-core Intel Core i7
- Radeon Pro 555 with 2GB of VRAM
- 16GB of 2400MHz DDR4 memory
MacBook Pro:
- 2.8GHz quad-core Intel Core i7
- Radeon Pro 555X with 2GB of GDDR5 memory
- 16GB 2133MHz LPDDR3 memory
For 1080p60 (4Kp60 HDR pass-through supported)
iMac:
- 3.6GHz quad-core Intel Core i7
- Radeon Pro 555 with 2GB of VRAM
- 16GB of 2400MHz DDR4 memory
MacBook Pro:
- 2.6GHz quad-core Intel Core i7
- Radeon Pro 450 with 2GB of GDDR5 memory
- 16GB of 2133MHz LPDDR3 onboard memory
Notes:
- LGU does not support USB 2.0
- LGU does not support USB 3.1 Gen 2
- We strongly recommended to use Intel chipset.
- For 4K, HDR or High frame rate recording only NVIDIA graphics card are supported.
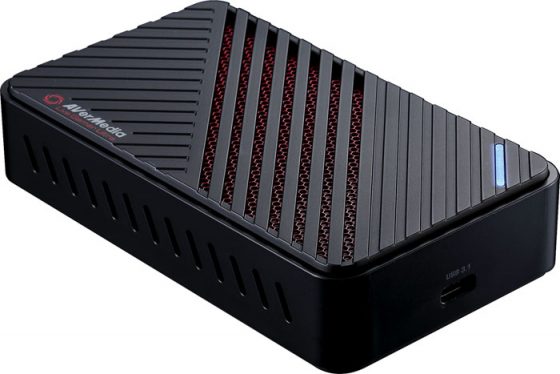
The Live Gamer Ultra 4K also comes in a nice simple box which upon opening it, you will immediately see the device. The device looks different from the Live Gamer Extreme 2 in size and shape, making it a bit more compact for travel or hiding it away on your desk so to not be visible. The Live Gamer Ultra 4K has a beefier processor to handle the 4k resolution it will push out and has a built-in fan to help with the heating of the processor itself. It also has light indicators letting you know when you are live streaming or recording in case you aren’t sure. The Live Gamer Ultra 4K pushes out a beautiful 4K resolution and is easy to use much like the Live Gamer Extreme 2. Easy plugin and easy installation. It also comes with 1 HDMI cable, 1 USB 3.0 cable, and the device itself.
The Live Gamer Ultra 4K also comes with the CyberLink PowerDirect 15 editing program for additional editing like a pro! The only real difference is the processing power it needs to push 4K resolution so just make sure you have the appropriate specs and monitor to display it, otherwise, you won’t really see the difference at all... Other than that, the performance and results are definitely pleasing and should make your streams/videos looks the best they could ever be.
Live Gamer Ultra 4K:
RECentral 4 & RECentral Express
The RECentral 4 streaming program, whether it be Express or 4, is basically the same with very small differences including the mainframe layout—slightly. The program itself is basically the same, but, depending on which device you get, there will be a different firmware update for you to install so make sure you are up-to-date with the program fixes. And if you are not sure about program compatibility, AVerMedia has got you covered with a paring program to make sure things are in order. Just make sure to head over the AVerMedia.com under gaming and choose the device you have to be redirected to this area.
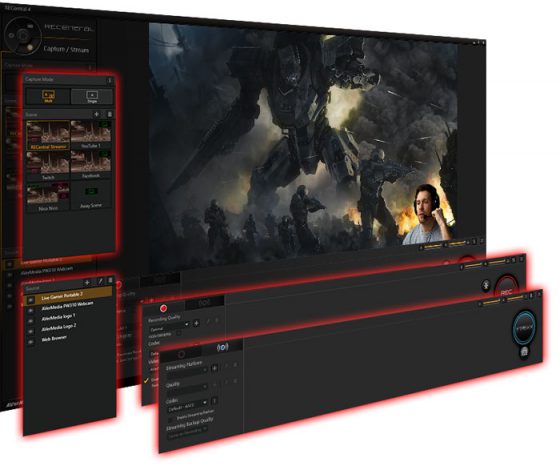
RECentral 4 is easy to install and easy to navigate. Right off the bat, you got 3 main functions to use in the program: Capture/Stream, Media Share, and Settings.
Capture/Stream
Under Capture/Stream, you have 2 main modes to choose from which are Multi capture mode and Single capture mode. It should be common sense to the average streamer but Single mode clearly will only capture what is visibly shown via the capture device. Multi allows not only the capture device to be selected, but other features as well including your profile camera, an image, a video, text input, and web sources from URL links like StreamLabs, Muxy, etc.
Once you select this mode, it creates a Scene for you that contains other sources you can later add before you initially begin streaming. So you can create an Opening, BRB, Closing scenes for your stream to look and feel professional. As far as how many Scenes you can create, there is no limit but, of course, when creating too many scenes you’ll have a hard time navigating with the scroll function as the window for it is not adjustable like it is on OBS.
From there, you can add as many sources to your Scene for the ultimate setup which can include your alert bot system (StreamLabs, Muxy, etc.), your camera, images/video overlaying, web browser URLs, etc. The cool thing is you can do live editing if needed on the fly.
Media Sharing
Media Sharing is basically your upload and download center for already created videos you may want to use in your stream, to downloading your most recent stream upon pressing the Record button before actually streaming. Of course, you can record at any point during your stream so there should be no limitation on creating highlights or clips for your viewers later on via the RECentral 4 streaming program. The choice is yours but everything is easily accessible from the Media Sharing mode.
One last thing to mention is the fact that the Media Sharing mode has an easy setup for immediately sharing your vids or streams directly to your social media account(s). RECentral 4 also allows you to rename, create tags, or delete any video before finalizing and sharing, right from the program itself. Sharing platforms available are YouTube and Facebook via the SNS Share button.
Settings
For the settings, it’s pretty simple and clear. You have General to choose your language for the program, Save Path for downloading location of your content, and there is display performance enabling which improves video movement and eliminates any choppy framerates that might occur while streaming.
There are also Shortcut keys for you to utilize while streaming before and after like a Start/Stop and Recording/Streaming key, a microphone on/off key, a Take Snapshots key, an add Time Markers in Live Editing, a Press to Talk function key and finally, assigning a microphone to a specific key.
Next, you have your social media account linking which Twitter, YouTube, and Facebook are your only options but still, the necessary SNS platforms for live streaming. And if you have any files that are compatible with the RECentral 4 program, Export and Import capabilities are available.
Lastly, you have the About and Capture Device sections where you can look up info and check for updates regarding the streaming device and program. For the Capture Device section, you can toggle between HDCP so that iOS devices can be readable via the RECentral 4 and a Performance Test program is built-in and available so you can make sure you have the right bandwidth and if your PC is powerful enough to handle the workload.
Streaming & Recording
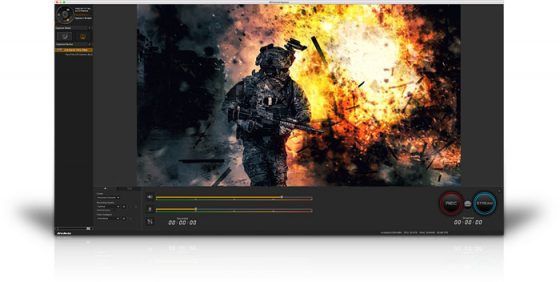
The first thing to talk about is the Recording feature. It’s basically simple and you can’t go wrong when using it unless you forget to press the record button… That will then be on you…
You have the ability to change the quality of the recording to that which best suits your program settings and internet speed: Optimal, Good, Normal, Default Profile. In addition, you’re able to rename/set the category of the recording and you can also enable the hardware acceleration (DXVA) function for reduced CPU when Live editing. Perfect for those who like to edit on the go.
Next up, we have the streaming part of the program. For streaming to a platform, your options are Twitch, UStream, YouTube, NicoNico, SmashCast, Facebook, Mixer, and Douyu.Com. There is also the option to use a custom RTMP if you have one set up. And there really isn’t a limit to how many accounts to you link to RECentral 4 program.
Under the stream setting which you can access via the scene overlay on your video screen, you can adjust the details of the device by adjusting the Source settings, the Positioning of the video, Images if any, and you can add Filters and Backgrounds to your live broadcast including Chroma Key options.
After your streaming account setup, you just need to select which account you want to stream to, choose your video quality setting—same options as the Recording section minus the Default Profile option—and you’re pretty much set. You also have the ability to choose Enable Streaming Backup which automatically saves your stream, plus, you can choose the video quality from there as well. And as an added bonus, you can add the custom created End Screen which is built-in to the program to professionally fade out of your stream to conclude the broadcast. Pretty cool!
The last thing we want to mention regarding the streaming part of RECentral 4, is the program allows you to multistream to other platforms simultaneously! Of course, if you are an affiliate on Twitch, better make sure to read the guidelines and regulations as this will not benefit you at all...Heads Up!
Audio
For the audio, it is very sensitive but allows you to adjust your settings manually for optimized sound during your recording or broadcast. We had a little trouble adjusting things at first, but then once the settings were fixed, everything was smooth sailing after that. Not much detail we can go into this as it is what it is.
Bonus Features
As for bonuses that came with the device, there was the gifting of the CyberLink PowerDirect 15 program that comes FREE with the AVerMedia product purchase via key code inside each product boxing. So, if live editing isn’t enough for you within the device itself, you have this editing program ready for your imagination and use provided by AVerMedia. Super Cool! We didn’t delve into this as it would merit its own review. Just know, you’re getting a great deal here from AVerMedia.
Honey’s Final Verdict
All-in-all, the Live Gamer Ultra and the Live Gamer Extreme 2 are ideal for those wanting to join the gaming scene by streaming original content on whichever platform of choice. We didn’t really mention the RECentral EXPRESS as it is basically the same exact program—but with some limitations compared to the RECnetral 4 prorgam—and is only downloadable for Mac OS computers. One main thing we did notice at a glance is the multistreaming function is not available… Other than that, EXPRESS is more for those on-the-go using Mac laptops and such, but definitely, PC is the way to go, hands-down.
While we had some audio issues on our end, it really isn’t significant enough that we can give negative feedback because once we figured it out, things were good! Also, if you are thinking about joining the streaming scene, make sure to do your research. Depending on the type of streaming you want to do and how much effort you want to put in, AVerMedia may or may not be for you. If comparing to other streaming devices like Elgato, OBS, XSplit and the likes, AVerMedia is right up there with Elgato and OBS! Again, each one offers different options for streaming so make sure you choose the right one!
With that, we have concluded our review for the AVerMedia Live Gamer Ultra & Live Gamer Extreme 2. Both devices are powerful machines pushing the boundaries of live broadcasting and editing. We highly recommend getting one of the aforementioned devices from AVerMedia. If you have any questions or comments, sound off below and we’ll try our best to answer them!

Author: Alfonso "Fonzy" Ortiz
Recommended Post
Unboxing Bloody's B820R Keyboard Review
Recommended Post
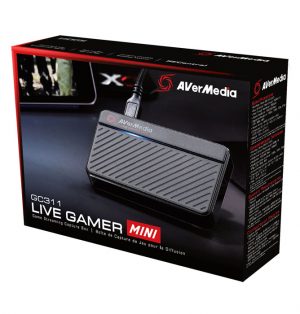
Unboxing AVerMedia's Live Gamer Mini
Recommended Post